
Pruning
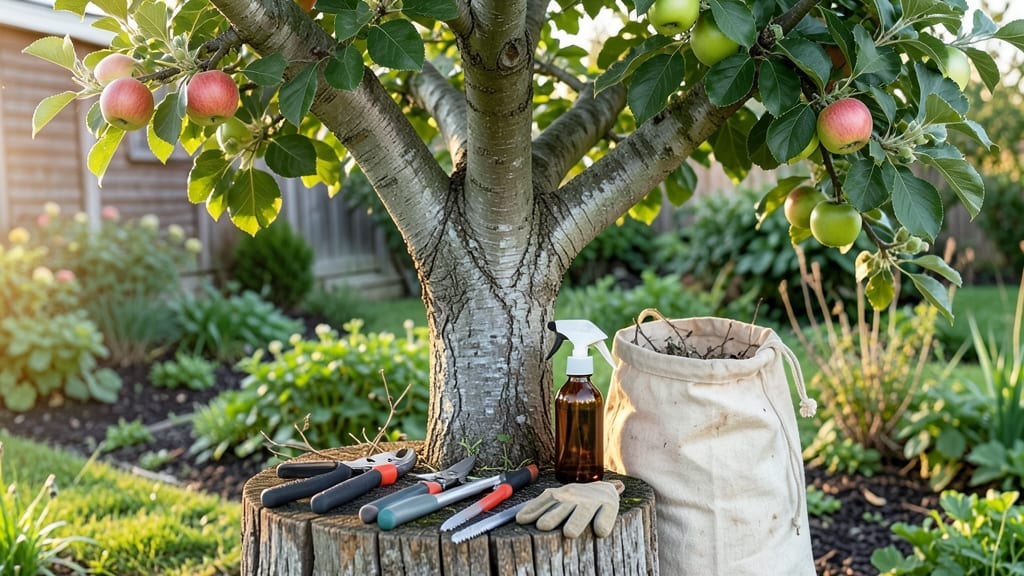
Trimming fruit trees the right way can boost your harvests by 50%—and it’s all about mastering these four strategic cuts, each timed to maximize growth, not just aesthetics. 🌳 What most gardeners miss is that pruning isn’t just about cleaning up branches; it’s about teaching the tree where to focus its energy for bigger fruit and stronger structure. I’ve spent years perfecting this system, and the difference in my orchard is night and day.
The real secret? Pruning isn’t just a spring chore—it’s a year-round conversation with your tree. Winter cuts shape the framework, early spring opens the canopy for sunlight, summer thins out overcrowded branches, and late summer preps for next year’s blooms.
Each cut serves a purpose, and skipping any step means missing out on that extra bushel of apples or peaches.
You’ll end up with trees that look like artistic sculptures while producing more fruit than you know what to do with. The branches will be evenly spaced, sunlight will reach every inch of the canopy, and you’ll avoid the common mistakes that lead to weak growth or disease.
No more struggling with tangled limbs or wondering why your harvest keeps shrinking.
Works for apples, peaches, cherries, and even citrus—just adjust the timing slightly based on your climate. Whether you’re a backyard grower or managing a small orchard, these four cuts will transform your fruit trees into high-yielding, healthy powerhouses. Let’s get those pruners sharp and start shaping your future harvests.
📚 In This Guide
- What you need
- Instructions
- Tips and common mistakes
- Wrapping up and next steps
What you need
- ● Pruning shears (bypass or anvil type) – Choose sharp, high-quality shears (4–6 inches) for clean cuts on small branches.
- ● Loppers – For medium branches (1–2 inches thick), opt for bypass-style loppers with a long handle for leverage.
- ● Pruning saw – A curved-tooth saw (8–10 inches) for thick branches (2+ inches) to avoid splintering.
- ● Gloves – Garden or pruning gloves with cut-resistant palms to protect against thorns and sharp edges.
- ● Disinfectant (70% isopropyl alcohol or bleach solution) – Clean tools between cuts to prevent disease spread.
- ● Rubbing alcohol or hand sanitizer – Keep your hands clean while working.
- ● Bucket or bag – For collecting pruned branches and debris.
- ● Pole pruner – For high branches (extendable up to 10+ feet).
- ● Tree climbing spikes – If your tree is tall and you’re comfortable climbing (safety first!).
- ● Marking spray or tape – To flag branches to remove before cutting.
- ● Knee pads or stool – For comfort during long sessions.
- ● First-aid kit – Just in case of minor cuts or scrapes.
Step-by-Step guide to trimming fruit trees for shape and productivity
Here’s the method I’ve used for years to keep fruit trees healthy, productive, and easy to harvest.
✂️ Step 1: Remove Dead, Diseased, or Crossing Branches First
Start by scanning the tree for any branches that are dead (brown, brittle, or no leaves), diseased (fungus, spots, or oozing sap), or crossing (rubbing against each other). These are the lowest-hanging fruit—literally and figuratively—because they’re either already dead weight or will become entry points for pests. Use sharp pruning shears to make clean cuts just outside the branch collar (the swollen area where the branch meets the trunk).
I always tackle these first because they’re the easiest to spot and remove. If you leave them, they’ll sap energy from the rest of the tree, and crossing branches will eventually split under fruit weight. Cutting them early also gives the tree a chance to heal before you make more cuts. Never leave stubs—always cut back to the branch collar for the cleanest, fastest healing.
✂️ Step 2: Thin Out Overcrowded Branches for Better Airflow
Next, focus on the tree’s center and canopy. Look for branches that are growing too close together or inward toward the trunk—these create a dense, shaded interior where air can’t circulate. Poor airflow leads to fungal diseases like powdery mildew and makes it harder for sunlight to reach the inner fruit. Remove about 20-30% of the smallest, weakest branches in this area, cutting them back to a strong outward-facing branch or the trunk.
Here’s the thing—I know it seems counterintuitive to cut back branches when you want more fruit, but thinning actually boosts production. When branches aren’t competing for sunlight and nutrients, the remaining ones grow stronger and bear heavier crops. You’ll see the difference in just one season: fewer broken limbs and fruit that ripens evenly instead of a few clusters while others stay green.
✂️ Step 3: Shape the Tree’s Canopy for Easy Harvesting
Now it’s time to shape the tree’s overall structure. Step back and visualize an open, vase-like shape—this lets sunlight reach all branches and makes picking fruit easier. For young trees, focus on creating a strong central leader (the main vertical trunk) and 3-5 well-spaced scaffold branches that spread outward at about a 45-degree angle. For mature trees, prune to maintain this shape by removing branches that grow straight up or downward.
I like to use the “thirds rule” for shaping: cut back branches that are growing too long to about one-third of their length. This encourages bushier growth and prevents the tree from becoming top-heavy. Avoid cutting more than 25% of the tree’s canopy in one season—this stresses the tree and can reduce next year’s fruit set. If you’re unsure, err on the side of caution and make smaller cuts.
✂️ Step 4: Prune for Fruit Production in Late Winter
The best time to prune most fruit trees is in late winter or early spring, before buds swell. This timing ensures the tree has time to heal before the growing season. Focus on removing water sprouts (fast-growing, vertical shoots) and any branches that are growing too close to the ground. You’ll also want to shorten branches that bore fruit the previous year by about one-third to encourage new growth and more fruit buds.
Real talk: Pruning in late winter is easier because you can see the tree’s structure without leaves in the way. Avoid pruning in fall—it leaves wounds open to fungal infections over winter. After pruning, clean your tools with rubbing alcohol to prevent spreading disease between cuts. If you’re working with a large tree, break the job into sections over a few days to avoid exhausting yourself (and the tree!).
Tips & tricks for perfect fruit tree trimming
Took me years to figure out these simple tricks that make all the difference when shaping your fruit trees.
The Branch Collar Rule: In Step 1, when cutting back branches, always look for that swollen area where the branch meets the trunk—the branch collar. Cutting just outside this collar gives the tree the best chance to heal properly. I’ve seen too many trees develop cankers from improper cuts that leave stubs—it’s a slow death for the branch. Use sharp pruning shears and make clean cuts at a slight angle to prevent water from pooling.
Visual Pruning Guide: For Step 2, imagine your tree’s canopy as a vase shape when you step back. You’re aiming for sunlight to reach all branches evenly. I like to hold a string or garden twine against the tree to visualize the open center. This helps me spot branches that need removal—anything growing inward or too close together gets the cut. The goal is to create that airy, well-lit structure that prevents disease and makes harvesting a breeze.
Seasonal Timing Matters: Step 4 emphasizes late winter pruning, but here’s what nobody tells you—if you must prune outside this window, summer is the second-best time. Just avoid fall at all costs. I’ve made this mistake with my peach tree, and the wounds stayed open all winter, inviting fungal infections. If you’re pruning in summer, focus on removing only water sprouts and diseased branches, not major structural cuts.
Tool Maintenance Secret: After every pruning session, clean your tools with rubbing alcohol—not just water. I keep a small bottle in my pruning kit and wipe down blades between cuts. This prevents spreading diseases between branches. Also, sharpen your shears regularly—dull blades tear wood instead of making clean cuts, which stresses the tree and invites infections. A little maintenance goes a long way in keeping your trees healthy.
Pro Tips for Trimming Fruit Trees
- Took me years to figure out these simple tricks that make all the difference when shaping your fruit trees.
- The Branch Collar Rule: In Step 1, when cutting back branches, always look for that swollen area where the branch mee...
- Visual Pruning Guide: For Step 2, imagine your tree’s canopy as a vase shape when you step back. You’re aiming for su...
Frequently asked questions
Got questions about trimming your fruit trees? You’re not alone! Here are answers to the most common concerns to help you prune like a pro and keep your trees thriving.
When is the best time to trim fruit trees?
The ideal timing depends on the type of fruit tree. For most deciduous varieties (like apples, peaches, and cherries), late winter or early spring (before buds swell) is best. Citrus and evergreen trees (like avocados) can be pruned in late winter or early spring too, but avoid heavy cuts in summer. Always trim when the tree is dormant for faster healing.
Can I trim fruit trees in summer?
Light trimming in summer is fine for shaping or removing dead branches, but avoid heavy pruning. Summer cuts can stress the tree, making it vulnerable to pests and diseases. If you must trim, do so in early summer (June) and keep cuts small. Focus on removing only water sprouts or crossing branches.
Will trimming reduce my fruit harvest?
Not if done correctly! Proper pruning increases fruit production by improving airflow and sunlight penetration. However, over-pruning (removing too many branches at once) can temporarily reduce yields. Aim to remove no more than 25% of the tree’s canopy in a single session. Thin out crowded branches to boost fruit quality and size.
What if my tree bleeds sap after pruning?
Sap bleeding (especially in maples, birches, or fruit trees like cherries) is normal and harmless. It won’t harm the tree, but it can be messy. To minimize it, prune on dry, cool days and avoid cutting into large branches. If bleeding bothers you, seal cuts with pruning sealant (though many experts say it’s unnecessary for fruit trees).
Do I need special tools for trimming fruit trees?
Basic tools like bypass pruners, loppers, and a pruning saw work for most jobs. For larger branches, a pole saw or harvesting saw helps. Sterilize tools with rubbing alcohol between cuts to prevent disease spread. Avoid anvil pruners—they crush branches, which can damage the tree.
How do I tell if I’ve over-pruned my tree?
Signs of over-pruning include sparse foliage, weak new growth, or fewer flowers/fruit the following year. If the tree looks stressed, it’s recovering—just avoid heavy cuts for 1–2 years. Focus on light maintenance pruning to help it bounce back. Patience is key!
Wrapping up and next steps
Trimming your fruit trees isn’t just about aesthetics—it’s the secret to healthier trees, bigger harvests, and easier maintenance. 🌳 By mastering the 4 key cuts (dormant shaping, spring cleanup, summer thinning, and post-harvest recovery), you’ll encourage strong growth, prevent disease, and enjoy bountiful fruit for years.
The best part? Every season offers a chance to refine your skills!
Ready to transform your orchard? Grab your pruners and review the tools—then roll up your sleeves and start trimming! Your future fruit will thank you. 🍎✨