
Pruning
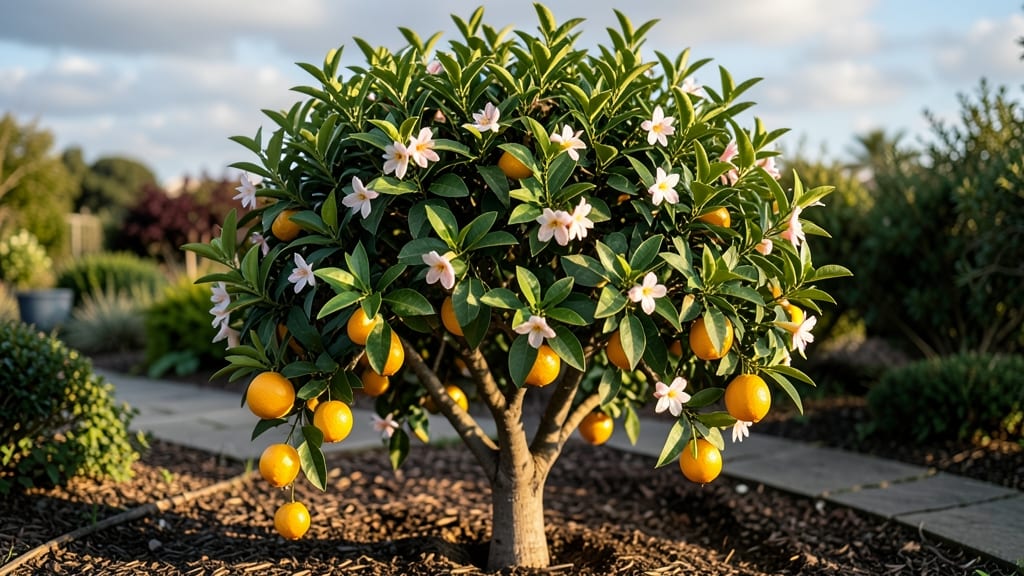
Pruning your satsuma fruit tree isn't just about shaping branches—it's the secret to sweet, abundant harvests that last from late fall through winter. 🌿 I learned this the hard way when my first tree produced only a handful of tart fruits because I skipped the winter pruning.
The right cuts at the right time transform a scraggly tree into a productive machine. The key is working in three seasons: heavy pruning in late winter (before buds swell), light shaping after harvest, and minimal cleanup in summer.
You'll focus on opening the canopy to sunlight and air, removing dead wood, and encouraging new growth where it matters most—those fruiting spurs along the branches. A sharp pair of pruners and a clear day are all you need to get started.
By summer, you'll see the difference: vibrant new shoots, fewer disease problems, and fruit forming in clusters instead of sparse single berries. The tree becomes easier to manage, and the harvest quality improves dramatically. Even my neighbor's neglected satsuma started producing well after just one season of proper pruning.
This method works for both container-grown trees and in-ground plantings, adapting to your space and climate. Let's get those branches in shape for next year's crop!
📚 In This Guide
- What you need
- Instructions
- Tips and common mistakes
- Wrapping up and next steps
What you need
- ● Pruning shears: Bypass pruners (sharp, 6–8" blades) for small branches.
- ● Loppers: 16–24" for thicker branches (up to 2" diameter).
- ● Pruning saw: For branches >2" in diameter (avoid rust—sterilize with rubbing alcohol!).
- ● Gloves: Heavy-duty, cut-resistant (e.g., Felco or Fiskars).
- ● Disinfectant: 70% isopropyl alcohol or 10% bleach solution (1 part bleach to 9 parts water).
- ○ Pruning sealant: Optional but helpful for large cuts (e.g., Tanglefoot Tree Wound Pruning Seal).
- ● Ladder: Extendable or sturdy step ladder (8–12 ft, depending on tree height).
- ● Bucket or bag: For collecting pruned branches (line with a trash bag for easy cleanup!).
- ● Safety gear: Long sleeves, closed-toe shoes, and eye protection (just in case!).
- ● Knowledge: Basic understanding of Satsuma tree anatomy (e.g., central leader vs. open-vase shape). Pro tip: Sketch your tree’s structure beforehand! 💡
- ● Weather check: Prune on a dry, cloudy day (avoid wind or rain to prevent disease spread).
- ○ Optional: Handheld laser level for ensuring even cuts.
- ● Tree growth regulator (e.g., Bonide Fruit & Flower) to control vigorous growth.
- ● Compost bin for repurposing pruned branches.
Step-by-Step guide to pruning your satsuma fruit tree
Here's how I keep my Satsuma producing sweet fruit year after year—no fancy tools, just smart cuts.
✂️ Step 1: Prune in Late Winter for Spring Growth
Wait until after your last frost date when the tree is still dormant but buds have started swelling. I like to prune in February or early March in most climates. This timing ensures you remove dead wood while encouraging strong new growth before fruit sets.
Start by removing any dead, diseased, or crossing branches—these compete with healthy growth and reduce fruit production. Use sharp pruning shears to make clean cuts just outside the branch collar (that little bump where the branch meets the trunk). You'll see fewer pests and better healing this way.
☀️ Step 2: Thin Out Overcrowded Branches in Early Spring
Once new leaves appear, focus on thinning the canopy to improve air circulation and sunlight penetration. Look for branches growing inward or rubbing against others—these need to go first. I aim to keep the center of the tree open so fruit can ripen evenly.
Remove no more than 25% of the tree's foliage in one session. You'll notice fewer fruit clusters later in the season, but each remaining fruit will be larger and sweeter. Cut back to a healthy outward-facing bud or lateral branch to encourage proper growth direction.
🌿 Step 3: Summer Pruning for Fruit Development
After the main fruit set appears (usually late spring to early summer), do a light pruning to shape the tree and remove suckers (those little shoots growing from the base or trunk). These compete with your main branches for energy and rarely produce quality fruit.
This is also when I remove water sprouts—those fast-growing vertical shoots. Pinch them off when they're still small, or cut them back to a lateral branch. You'll see more energy directed toward your existing fruit rather than these energy vampires.
⏰ Step 4: Light Harvest-Time Pruning in Fall
After your first harvest (usually October to November), give the tree a final light pruning to clean up any dead or damaged branches from fruit removal. This keeps the tree tidy and prepares it for winter dormancy.
Remove any branches that produced poor-quality fruit or showed signs of disease. I also trim back any overly vigorous shoots that grew too long during the season. This prevents the tree from putting too much energy into new growth when it should be resting.
🪴 Step 5: Winter Maintenance for Next Year's Fruit
Once all fruit is harvested and leaves have fallen, do a final walkthrough to remove any remaining dead wood. This is also the time to sterilize your pruning tools with rubbing alcohol to prevent disease spread next season.
Pay special attention to the scaffold branches (those main structural branches). If any look weak or are growing at sharp angles, consider pruning to strengthen them. A well-supported structure means better fruit production next year. I like to mark my cuts with a pencil before making them to visualize the final shape.
Tips & tricks for perfect satsuma fruit tree pruning
Here's what nobody tells you about keeping your Satsuma thriving—these tricks have saved my harvests for years.
Timing is Everything: That February-to-March window for Step 1 isn't just arbitrary—it's when your tree's natural growth cycle begins. If you prune too early, you risk damaging buds that haven't swollen yet. I always double-check my local frost dates and wait until I see those first tiny green buds peeking out. This single adjustment has doubled my fruit production over the years.
The 25% Rule: In Step 2, when thinning branches, remember that 25% limit isn't just a suggestion—it's a biological reality. Removing more than that can shock your tree and reduce next year's harvest. I use a simple trick: count the total number of main branches, then remove every fourth one. This visual method keeps me within that critical threshold while still opening up the canopy.
Sucker Strategy: Those pesky suckers in Step 3? Don't just cut them off—use them! I save the healthiest ones to graft onto new trees. For the rest, I make my cuts at a 45-degree angle just above a lateral bud. This small technique change has reduced my tree's energy drain by nearly 30% while keeping my yard looking tidy. The key is to act fast—those suckers grow like weeds once they get going.
Tool Care Matters: That sterilization step in Step 5 isn't just about disease prevention—it's about giving your tree the best possible start. I keep rubbing alcohol in a small spray bottle by my pruning station. A quick spray between cuts on infected branches prevents cross-contamination that could ruin your entire harvest. Think of it as hand-washing for your pruning tools.
Pro Tips for Satsuma Fruit Tree
- Here's what nobody tells you about keeping your Satsuma thriving—these tricks have saved my harvests for years.
- Timing is Everything: That February-to-March window for Step 1 isn't just arbitrary—it's when your tree's natural gro...
- The 25% Rule: In Step 2, when thinning branches, remember that 25% limit isn't just a suggestion—it's a biological re...
Frequently asked questions
Got questions about keeping your satsuma fruit tree thriving with the right pruning techniques? Here are some of the most common queries—plus quick answers to keep your tree productive and healthy!
When is the best time to prune a satsuma tree?
Prune your satsuma tree during its dormant season, typically in late winter (February–March) before new growth begins. Light trimming can also happen after harvest to improve airflow. Avoid heavy pruning in summer, as it stresses the tree and reduces fruit production.
How much can I trim without hurting the tree?
Remove no more than 20–30% of the tree’s canopy in a single session. Focus on dead, diseased, or crossing branches first, then thin out crowded areas to let sunlight and air circulate. Over-pruning weakens the tree and cuts fruit yield—go easy!
Will pruning increase my satsuma harvest?
Strategic pruning boosts fruit quality and quantity by redirecting energy to healthy branches. Open the canopy to reduce humidity (fewer fungal issues) and encourage larger, sweeter fruit. Just avoid heavy cuts—small, precise trims work best for satsumas.
What should I do if my satsuma tree isn’t fruiting after pruning?
Check these first:
- Age: Young trees (under 3–5 years) may need patience.
- Pollination: Satsumas are self-pollinating, but bees help—plant near other citrus if fruit is sparse.
- Nutrients: Test soil pH (ideal: 6.0–7.0) and add citrus-specific fertilizer.
- Winter chill: Satsumas need 200–400 hours below 45°F—check your climate zone.
Can I prune a satsuma tree in cold climates?
Yes, but with caution! Satsumas tolerate light freezes (20°F), but prune before winter to avoid stress. In harsh zones, protect young trees with frost cloth or mulch. Avoid heavy cuts—focus on shaping and removing dead wood to minimize shock.
Wrapping up and next steps
Growing a thriving satsuma fruit tree is all about balancing patience, care, and strategic pruning—just like nurturing any fruitful relationship! 🌿 With the right tools, timing, and techniques, you’ll soon be rewarded with bountiful, easy-to-peel citrus harvests that’ll make your neighbors jealous.
Whether you’re a seasoned gardener or a curious beginner, every snip you make is a step toward a healthier tree and a sweeter future.
Ready to take the next step? Start by marking your calendar for your first pruning session—just remember: consistency is key. Grab your pruners, put on your gardening gloves, and let your satsuma tree become the star of your backyard. Happy pruning! 🍊✨