
Pruning
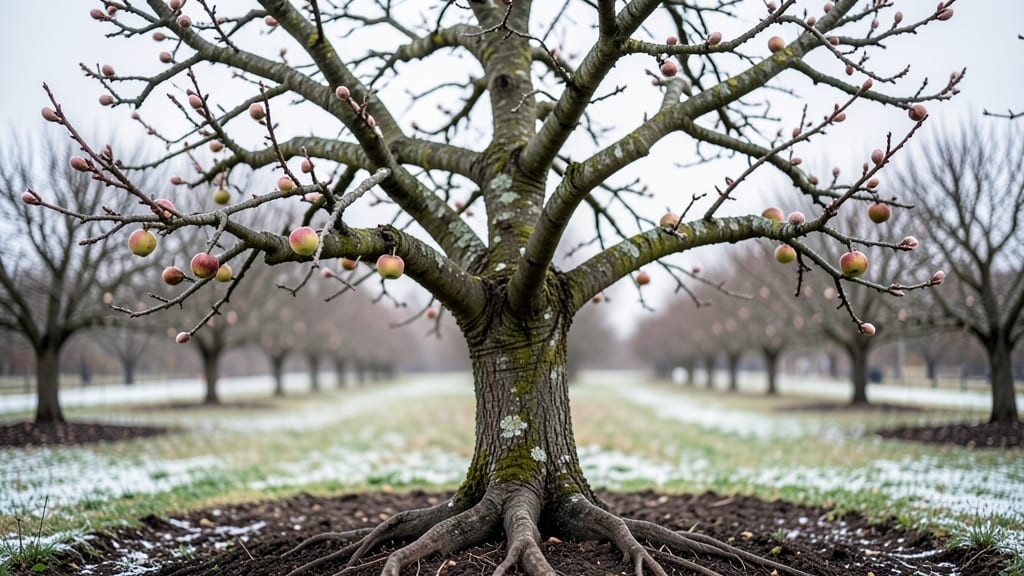
Winter pruning your apple trees now means year-round harvests—even in cold climates where fruit storage becomes a challenge. 🌳 I’ve learned the hard way that skipping winter pruning leads to crowded branches, smaller apples, and trees struggling to recover by spring.
The right cuts now determine how many bushels you’ll have in summer and how well they’ll keep through winter.
This isn’t about hacking branches willy-nilly—it’s about opening the tree’s canopy to sunlight and air, which prevents disease and boosts fruit quality. You’ll want sharp pruners, a clear day (so you can see the tree’s structure), and a plan to remove dead, crossing, or overcrowded branches first.
Think of it like giving your tree a spa day before the growing season kicks in.
By spring, you’ll see stronger new growth and fruit clusters that develop larger, sweeter apples. Proper winter pruning also makes summer thinning easier, so you’re not left with a mess of tiny, misshapen fruits. Plus, well-pruned trees handle frost better, so you’ll lose fewer blossoms come spring.
Works for both backyard orchards and single trees in the yard. Here’s how to do it right—no guesswork, just results. The payoff? Apples that store better, trees that live longer, and harvests that keep you stocked through winter. Let’s get those branches trimmed!
📚 In This Guide
- What you need
- Instructions
- Tips and common mistakes
- Wrapping up and next steps
What you need
- ● Pruning shears: Bypass pruners (for cuts up to ½ inch thick) – 1 pair (look for sharp, corrosion-resistant stainless steel blades).
- ● Loppers: Bypass or anvil type (for thicker branches, ¾–1½ inches) – 1 pair (extendable loppers are a game-changer for tall trees!).
- ● Pruning saw: Curved-tooth or bow saw (for branches over 2 inches) – 1 saw (avoid cheap models—they dull fast!).
- ● Gloves: Heavy-duty gardening gloves (cut-resistant, waterproof) – 1 pair (protects from thorns and blisters!).
- ● Ladder: Sturdy, extendable aluminum ladder (8–12 feet, with non-slip feet) – 1 ladder (safety first—never stand on wobbly steps!).
- ● Disinfectant: 70% isopropyl alcohol or bleach solution (1 part bleach to 9 parts water) – small spray bottle (sterilizes tools between cuts to prevent disease).
- ○ Sealing wax or pruning paint: Optional but helpful (for large cuts over ½ inch) – small jar (prevents moisture loss and pest entry).
- ● Weather check: Prune on a dry, frost-free day (ideally between 40–50°F). Avoid pruning if rain or freezing temps are forecasted within 24 hours.
- ○ Tree health assessment: Inspect your apple tree for dead, diseased, or crossing branches before starting. Mark them with flagging tape (optional but helpful).
- ● Safety gear: Safety glasses (to shield from debris) and long sleeves/pants (protect from thorns and cold).
- ● Cleanup supplies: Heavy-duty trash bags (for debris) and sharpie or marker (to label branches if grafting later).
- ● Tree wrap: Plastic or fabric tree guard (to protect bark from sunscald or rodent damage).
- ● Pruning guide: Printed diagram or app (like iTree or PruneTime) for reference.
- ● Extension pole: For loppers/shears (reaches high branches without a ladder).
- ● Compost bin: For repurposing pruned branches into mulch or compost.
How to prune apple trees for cold-weather productivity
Cold climates demand smart pruning to protect your apple trees and maximize fruit production.
✂️ Step 1: Time Your Prune for Late Winter Dormancy
Prune 6-8 weeks before your last frost date—this timing ensures wounds heal before spring sap flow begins. I target late February or early March in my zone 5 climate, when temperatures consistently stay above 40°F during the day. Pruning too early risks exposing tender wood to winter dieback, while waiting too long stresses the tree as growth resumes.
Look for dormant branches that appear dry and brittle—they’ll snap cleanly when bent. Avoid pruning when snow or rain is forecast; wet conditions spread disease through fresh cuts. Mark your calendar now: prune when the ground is still frozen but daytime temperatures are climbing.
✂️ Step 2: Remove Dead, Diseased, and Crossing Branches First
Start with 10% of the tree’s total branches—this is your structural reset. Cut out any branches that are dead (brown, hollow when tapped), diseased (oozing sap, fungal spots), or crossing/rubbing others. These are the weak points that invite pests and limit airflow. Use sharp bypass pruners to make clean cuts just outside the branch collar (the swollen area where the branch meets the trunk).
Real talk: If you see mummified apples still clinging to branches, remove those limbs too. They harbor fungal spores that’ll infect next year’s fruit. I always sanitize my pruners with rubbing alcohol between cuts to prevent spreading any hidden pathogens.
☀️ Step 3: Open the Canopy for Sunlight and Airflow
Next, thin the canopy to let sunlight reach the center—this is where most fruit develops. Remove branches growing inward at 45° angles or steeper, keeping only those that angle outward. Aim for an open vase shape with 6-8 main scaffold branches45-60° angles from the trunk.
Don’t overdo it—never remove more than 25% of the tree’s foliage in one year. If you’re unsure, step back and visualize the tree’s silhouette. You want a balanced shape with no dense clusters of branches. Thin from the inside out first, then work your way to the outer edges.
⏰ Step 4: Shape for Cold Hardiness and Fruit Production
Focus on water sprouts (fast-growing vertical shoots)—these are energy vampires that produce no fruit. Cut them back to a lateral branch or bud that faces outward. For horizontal branches, shorten them by 1/3 to 1/2 to encourage bushier growth. Look for fruit spurs (short, stubby branches with clusters of buds)—these are your future harvest zones, so protect them.
Here’s the thing—apple trees produce best when they’re slightly stressed. Pruning now forces the tree to redirect energy to root development and fruit buds rather than excessive leaf growth. In cold climates, this means more cold-hardy wood and heavier fruit sets next season.
🌿 Step 5: Clean Up and Protect the Tree
After pruning, rake up all debris and dispose of it in the trash (never compost—it spreads disease). Seal larger cuts (>1/4 inch diameter) with pruning sealant to prevent silver leaf disease, but skip it on small cuts—they heal faster without it. Apply a 2-inch layer of mulch around the base (but not touching the trunk) to insulate roots.
Finally, spray the tree with dormant oil to smother overwintering pests like scale and mites. I do this on a calm day when temps are between 40-60°F. The oil suffocates eggs without harming the tree—just avoid spraying if flowers are already blooming in early spring.
Tips & tricks for perfect apple tree pruning in winter
Winter pruning transforms your apple tree into a cold-hardy, fruit-producing powerhouse—here's how to avoid common mistakes.
Timing is Everything: The 6-8 week window before your last frost is non-negotiable. I learned this the hard way after watching spring sap flow ruin my pruning work. Check your local frost date and mark your calendar—pruning too early exposes tender wood, while waiting too long stresses the tree. A simple trick: prune when daytime temps consistently stay above 40°F but nights remain cold enough to keep the ground frozen.
Branch Angle Matters: In Step 3, pay attention to those 45-60° angles—they're nature's blueprint for strong branches. I always visualize the tree's silhouette while working. If you're unsure about an angle, hold your pruners at a 45° angle to the trunk as you cut. This creates the perfect framework for fruit production while allowing sunlight to penetrate the center where most fruit develops.
Pruning Sealant Strategy: Only use sealant on cuts larger than 1/4 inch diameter. I've seen beginners go overboard with sealant, thinking it protects all cuts—but small cuts actually heal faster without it. For larger cuts, apply a thin layer immediately after pruning to prevent silver leaf disease. Remember, the goal is to protect the tree, not smother it.
Dormant Oil Timing: Apply dormant oil when temperatures are between 40-60°F on a calm day. I schedule this for early spring just before buds swell. The oil suffocates overwintering pests like scale and mites without harming the tree. Just avoid spraying if flowers have already bloomed—you'll harm pollinators and potentially damage new fruit.
Pro Tips for Apple Winter Fruit
- Winter pruning transforms your apple tree into a cold-hardy, fruit-producing powerhouse—here's how to avoid common mi...
- Timing is Everything: The 6-8 week window before your last frost is non-negotiable. I learned this the hard way after...
- Branch Angle Matters: In Step 3, pay attention to those 45-60° angles—they're nature's blueprint for strong branches....
Frequently asked questions
Got questions about keeping your apple trees fruitful through winter?
Here are answers to the most common concerns—from timing to troubleshooting—so you can prune like a pro and enjoy year-round harvests, even in cold climates!
When is the best time to prune apple trees in winter?
The ideal time is late winter (February or early March), while trees are still dormant but before new growth starts. Pruning at this stage minimizes disease risk, reduces stress, and helps shape the tree for spring blooms. Avoid pruning in extreme cold or just before a freeze—wait for temps above 40°F (4°C) for cleaner cuts!
Will pruning in winter harm my apple tree?
Not if done correctly! Winter pruning is safe and beneficial when trees are dormant. Just avoid heavy pruning (never remove more than 25% of the canopy at once) and use sharp, sterilized tools. The key is timing—prune after the worst cold snaps but before buds swell. Think of it as a "haircut" for your tree, not a surgery!
Can I still get fruit if I prune too late in winter?
Pruning too late (March or April) can delay fruit set and reduce harvests, but it won’t kill your tree. If you miss the ideal window, focus on light maintenance pruning to remove dead wood and shape the tree. Late pruning may also attract pests, so prioritize cleaning up fallen leaves and sterilizing tools afterward.
What should I do if my apple tree isn’t producing fruit after pruning?
Several factors could be at play:
- Age: Young trees (under 3–5 years) may need more time to bear fruit.
- Variety: Some apple cultivars are biennial—producing heavy crops one year, then lighter the next.
- Pollination: Ensure you have two compatible apple varieties for cross-pollination.
- Nutrients: Test soil pH and add compost or fertilizer if needed (aim for 6.0–7.0 pH).
Are there winter-friendly alternatives if I don’t want to prune?
Yes! If pruning feels overwhelming, try these low-effort winter tree care tips:
- Mulch: Add 2–4 inches of organic mulch (straw or wood chips) around the base to insulate roots.
- Wrap trunks: Use tree guard fabric to protect against rodents and frost cracks.
- Thin fruit sparingly: Remove a few overcrowded apples in late winter to improve air circulation.
- Monitor pests: Check for wintering insects (like scale) and treat with horticultural oil if needed.
Wrapping up and next steps
Winter is the perfect time to shape your apple trees for bountiful harvests—whether you're a seasoned gardener or just starting out! By mastering pruning techniques, you’ll encourage healthier growth, better fruit production, and even easier maintenance in cold climates. 🌳✨
Now that you’re armed with the right tools, timing tips, and troubleshooting advice, there’s no better moment to roll up your sleeves and get pruning. Start with just one tree, observe its response, and build confidence as you go.
Before you know it, you’ll be enjoying year-round rewards from your winter prep work—so grab those shears and make this season your most productive yet!
Next step: Mark your calendar for late winter (just before buds swell) and begin pruning—your future harvest will thank you! 🍏🌟