
Plants
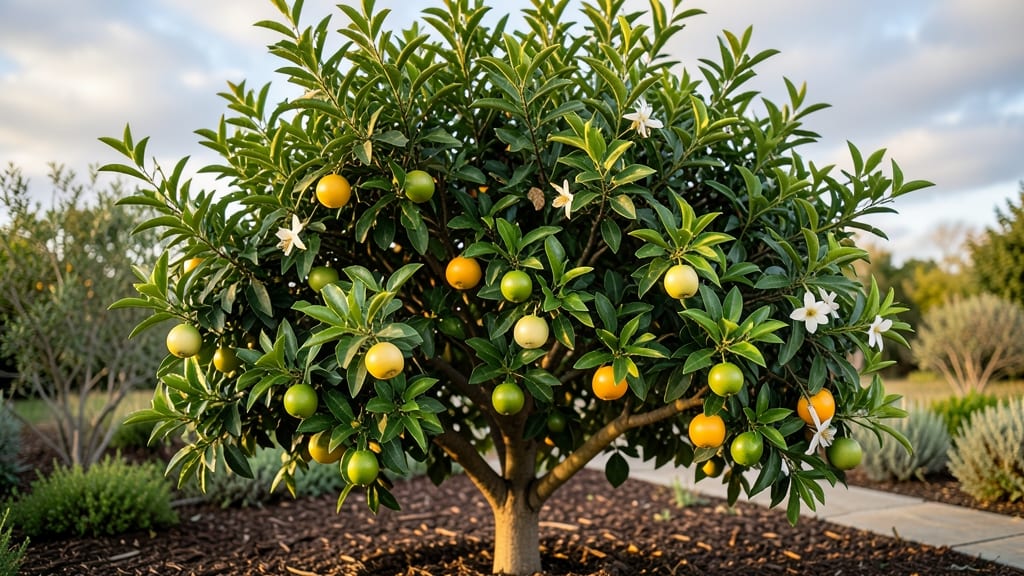
Understanding the stages of orange fruit development 🍊 is the secret to growing juicy, homegrown citrus that rivals your grocery store favorites.
Did you know an orange tree takes nearly a year to transform a delicate blossom into a juicy, vitamin-packed fruit? Without knowing what to expect at each stage, you might miss critical care moments that determine whether your harvest thrives or fails.
From the first fragrant bloom to the deep orange glow of ripeness, each phase demands different attention. Too much water at the wrong time? Your fruit could crack. Skipping fertilization during cell division? Your oranges might stay small and tart.
Below, I’ll walk you through every stage—what to watch for, how to support healthy growth, and the 3 most common mistakes that sabotage harvests. By the end, you’ll know exactly when to prune, pollinate, and protect your tree for a bounty of sweet, sun-ripened oranges.
Orange fruit development stages explained: visual timeline with key characteristics
Growing oranges from blossom to harvest is a year-long journey that requires precise care at each stage. From the first delicate white flowers to the vibrant, juicy fruit, understanding these developmental phases helps you maximize yield and troubleshoot issues early.
Each stage demands specific growing conditions and tree care adjustments to ensure healthy fruit progression.
As a gardener, I’ve learned that temperature fluctuations, watering habits, and nutrient timing can make or break your harvest. For example, overwatering during fruit set can cause blossom drop, while insufficient sunlight during maturation slows color development.
Let’s break down the 8 key stages of orange fruit development with visual cues and care tips.
During the blossoming stage, your orange tree produces fragrant white flowers that eventually become fruit. This phase is highly sensitive to temperature—below 55°F can cause flower drop.
I’ve found that hand-pollinating with a small brush helps if your area lacks bees. Ensure your tree receives 6+ hours of sunlight daily to support healthy blo
Critical factors affecting each stage of orange fruit development
Growing oranges successfully requires understanding how environmental factors impact each stage of fruit development. From delicate blossoms to ripe fruit, your tree's care must adapt to support its changing needs.
Temperature swings, inconsistent watering, or poor sunlight can derail progress at any phase. Let's explore the key variables that determine whether your oranges will thrive or fail.
During the blossoming stage, temperatures between 60-85°F are ideal for pollination. Below 55°F, blossoms may drop, while above 90°F, pollen production suffers. Even slight temperature fluctuations can reduce fruit set by up to 40%.
Proper hydration during this phase is equally critical—too much water stresses roots, while too little causes blossom drop.
Stage 1 (Blossoming): Frost (<50°F) kills flowers instantly; Stage 2 (Fruit Set): Overwatering causes fruit drop; Stage 3 (Cell Division): Nutrient deficiency stunts growth; Stage 4 (Maturation): Pests like aphids spread diseases.
Action: Monitor soil moisture with a finger, use mulch to regulate temperature, and apply balanced fertilizer (10-10-10) every 6-8 weeks during active growth.
The fruit set stage demands precise water management—too much causes fruit to split, while too little leads to small, bitter oranges. Maintain 1-1.5 inches of water weekly, delivered deeply at the tree's base.
Prune suckers and crossing branches to improve airflow, reducing humidity-related fungal risks like citrus greening disease. Sunlight exposure should remain 6+ hours daily, with afternoon shade in hot climates preventing sunburn.
As fruits enter the cell division phase (4-6 weeks post-pollination), they need consistent nutrient uptake. Apply potassium-rich fertilizer to strengthen cell walls and prevent cracking. Watch for aphids and scale insects, which excrete honeydew that attracts sooty mold.
Remove affected branches immediately and spray with neem oil for organic control. During this stage, prune only dead wood to avoid stressing the tree.
In the final maturation stage, oranges require reduced nitrogen to shift energy toward sweetening rather than leaf growth. Water less frequently (every 10-14 days) to concentrate flavors.
Harvest when skin color deepens and the fruit yields slightly to gentle pressure. Avoid harvesting in high humidity, which promotes mold growth on freshly picked fruit.
Remember, each stage of orange development is interconnected. A single misstep—like overwatering during blossoming or neglecting pests in cell division—can reduce your harvest by 50% or more. By adjusting care based on the tree's current needs, you'll maximize both quantity and quality of your homegrown oranges.