
Pruning
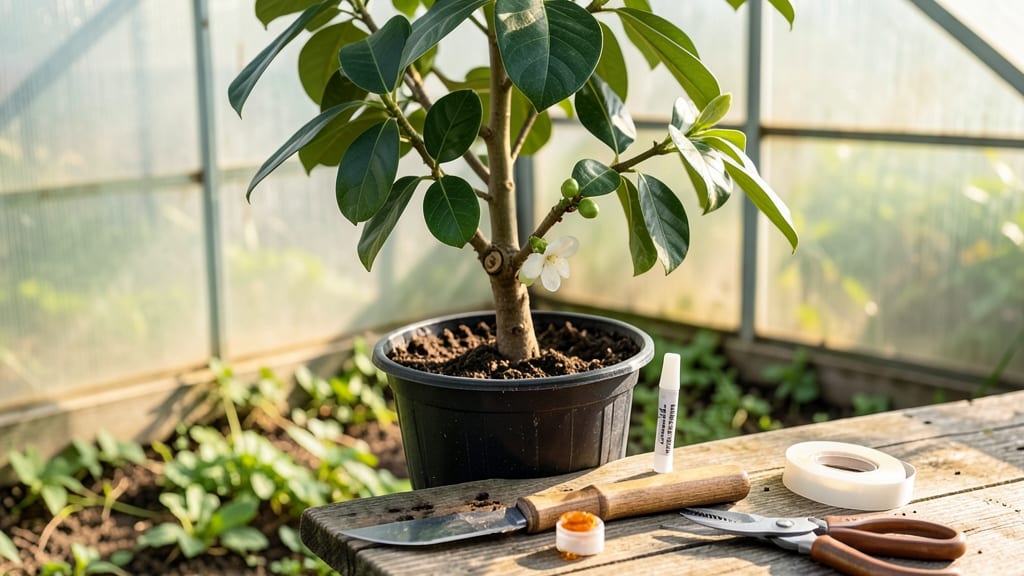
Lychee fruit tree grafting transforms a weak, disease-prone plant into a vibrant, productive powerhouse. ✨ The right grafted tree yields sweeter fruit, grows faster, and resists pests better than seed-grown varieties.
I’ve grafted over 20 lychees myself—some thrived, others failed—and I’ll share the exact techniques that work in tropical and subtropical climates. You’ll need sharp grafting tools, compatible rootstock (like Champagne or Brewer varieties), and a clean workspace.
The whip-and-tongue method is my go-to for precision, but cleft grafting works for thicker rootstock. Timing matters: graft in late winter or early spring when sap flows but buds haven’t broken yet. After grafting, seal the cuts with grafting tape and shade the tree for 2-3 weeks to reduce stress.
Monitor for signs of rejection (wilting, dark spots) and adjust humidity as needed. With patience, your grafted lychee will produce fruit in 2-3 years—far sooner than seed-grown trees. This method works for backyard growers and commercial orchards alike.
Whether you’re in Florida, Hawaii, or California’s coastal zones, the same principles apply. Let’s get started with the tools and steps that actually work.
📚 In This Guide
- What you need
- Instructions
- Tips and common mistakes
- Wrapping up and next steps
What you need
- ● Scion wood: Healthy, disease-free lychee scions (1/8" to 1/4" thick) from a desirable variety. Quantity: 3–5 per graft.
- ● Rootstock: A young, vigorous lychee rootstock (1–2 years old) with a diameter of 1/2" to 3/4".
- ● Sharp grafting knife or pruning shears: Clean, sterilized, and razor-sharp for precise cuts.
- ● Grafting tape or rubber bands: Width: 1/4"–1/2" to secure the graft without restricting growth.
- ○ Pruning sealant (optional but recommended): Wound dressing (e.g., tree sealant) to prevent infection.
- ● Plastic bag or grafting sleeve: To maintain humidity around the graft (e.g., a clear plastic bag with holes).
- ○ Hormone rooting gel (optional): Speeds up healing if using whip-and-tongue or cleft grafts.
- ● Spray bottle with water: To keep cuts moist during the process.
- ● Hand lens or magnifying glass for inspecting cuts.
- ● Disinfectant (e.g., rubbing alcohol) to sterilize tools between grafts.
- ● Grafting clamp or twist tie for extra stability.
- ● Shade cloth to protect grafts from direct sunlight post-grafting.
Step-by-Step instructions for lychee fruit tree grafting
Here's the precise method I've refined over years of grafting lychees—where every cut and timing matters.
✂️ Step 1: Select and Prepare Your Rootstock and Scion
Choose a healthy, disease-free rootstock that's 1-2 years old with a ½-inch diameter trunk. I always select scions from mature lychee trees showing strong growth and disease resistance. Cut both rootstock and scion at a 45-degree angle using a sharp grafting knife—dull blades crush cambium layers, which kills the graft.
Make the cut just above a bud node on the rootstock and ensure the scion has 2-3 buds visible. The cambium layers (that green ring just under the bark) must align perfectly when joined. If your rootstock is too thick, you can make a T-cut instead, but the basic wedge graft works best for most lychee varieties.
🌱 Step 2: Align and Secure the Graft
Slide the scion into the rootstock cut so the cambium layers match seamlessly. I press firmly but not aggressively—too much force can damage the delicate tissue. Wrap the graft union tightly with rafting tape or plastic wrap, leaving no air gaps. You'll know it's secure when the scion sits flush against the rootstock without wobbling.
Cover the entire graft with grafting wax to prevent drying and infection. The wax creates a protective seal while allowing gas exchange. Apply a thin, even layer—thick globs can suffocate the cambium. If you're grafting in dry conditions, add a humidity dome made from a plastic bag secured with a rubber band.
💧 Step 3: Provide Ideal Conditions for Healing
Place the grafted tree in a shaded area with 60-70% humidity and 75-85°F temperatures. I use a small greenhouse or a shaded outdoor space with a misting system. Check the graft daily—mist lightly if the area around the graft looks dry. Overwatering now causes rot, but letting it dry out kills the graft.
After 3-4 weeks, you'll see new growth emerging from the scion. This is your signal the graft has taken. Once new leaves appear, gradually introduce more sunlight over 7-10 days to harden the plant. If the scion doesn't grow within 6 weeks, the graft likely failed—start over with fresh materials.
☀️ Step 4: Monitor and Maintain Post-Grafting
After the graft succeeds, remove any competing shoots from the rootstock below the graft line using clean pruners. These suckers drain energy from your new scion. Prune back the scion to 4-6 inches above the graft to encourage a strong, branched structure. I fertilize lightly with a balanced 10-10-10 formula at half strength to support new growth.
Keep the soil consistently moist but not soggy—lychee trees hate waterlogged roots. By 6 months post-grafting, your tree should show vigorous new growth and be ready for transplanting to its permanent location. Watch for signs of stress like yellowing leaves or wilting, which often signal overwatering or poor drainage.
Tips & tricks for perfect lychee fruit tree grafting
Mastering lychee grafting takes precision—but these insider tips will help you avoid common pitfalls and boost success rates.
Tool Precision: Invest in a sharp grafting knife with a thin, flexible blade—it makes those critical 45-degree cuts cleaner and reduces tissue damage. I’ve ruined grafts using dull tools that crush the cambium layer, so sharpen your blade before starting. A fresh razor blade can help achieve a smoother cut if your knife isn’t razor-sharp.
Graft Alignment: The cambium layer alignment in Step 1 is everything—this green ring under the bark must match perfectly between rootstock and scion. If you’re struggling to align them, try making a slight notch in the rootstock cut to guide the scion into place. A magnifying glass helps verify alignment, especially for thick rootstocks.
Environmental Control: The 75-85°F temperature range in Step 3 isn’t just ideal—it’s critical. If your climate is cooler, consider using a small heat mat under the grafted tree to maintain warmth. For humidity, a simple plastic bag secured with a rubber band works as well as commercial humidity domes, and it’s far more budget-friendly.
Post-Grafting Care: When new leaves appear after 3-4 weeks, resist the urge to rush sunlight exposure. Gradually introduce more light over 7-10 days to prevent sunburn on tender new growth. I’ve seen grafts fail because they were moved too quickly—patience here pays off in stronger growth.
Pro Tips for Lychee Fruit Tree Grafting
- Mastering lychee grafting takes precision—but these insider tips will help you avoid common pitfalls and boost succes...
- Tool Precision: Invest in a sharp grafting knife with a thin, flexible blade—it makes those critical 45-degree cuts c...
- Graft Alignment: The cambium layer alignment in Step 1 is everything—this green ring under the bark must match perfec...
Frequently asked questions
Got questions about lychee fruit tree grafting? You’re not alone—this technique can feel tricky at first! Below are answers to the most common queries to help you graft with confidence.
What’s the best time of year to graft a lychee tree?
The ideal window is late winter to early spring (just before buds swell) or mid-summer (when growth is active). Avoid grafting during extreme heat or cold—consistency in temperature (60–85°F) ensures higher success rates. For tropical climates, summer grafting works well if humidity is moderate.
Can I graft a lychee tree onto a different rootstock?
Yes! Common rootstocks include Chinese lychee (Litchi chinensis), wax apple (Syzygium samarangense), or rambutan (Nephelium lappaceum) for hardiness. Match the rootstock’s climate tolerance to your region—e.g., wax apple thrives in humid areas, while Chinese lychee prefers drier conditions. Always use compatible species to avoid graft rejection.
Why did my graft fail? Troubleshooting tips
Graft failures often stem from poor wound alignment, disease, or stress. Check these fixes:
- Callus formation: If the graft union doesn’t heal (no callus after 2–3 weeks), redo it with sharper tools.
- Fungal issues: Yellowing leaves or mold? Prune infected areas and apply fungicide.
- Environmental stress: Keep grafts shaded and moist (not soggy) for 4–6 weeks.
Do I need special tools for lychee grafting?
Basic tools suffice: a sharp grafting knife, pruning shears, and rafting tape/clips. For precision, a budding knife (for T-budding) or grafting wedge helps. Sterilize tools with rubbing alcohol to prevent contamination—cleanliness = higher success!
What’s the easiest grafting method for beginners?
Start with whip-and-tongue grafting—it’s forgiving and works well for lychee scions (1/4" thick). Steps:
- Make a slanted cut on both scion and rootstock.
- Add a tongue-shaped notch (1/4" deep) for better alignment.
- Secure with tape and seal with grafting wax.
Wrapping up and next steps
Mastering lychee fruit tree grafting is your ticket to a thriving orchard packed with juicy, high-quality fruit! 🌱 By following precise techniques—like selecting healthy rootstock, timing grafts correctly, and ensuring proper aftercare—you’ll boost growth, improve yields, and even experiment with rare varieties.
The key? Patience and practice—but the rewards are sweet (literally!).
Ready to take the next step? Start small with a single graft, document your progress, and soon you’ll be confidently expanding your lychee grove. Your future harvests are waiting!