
Propagation
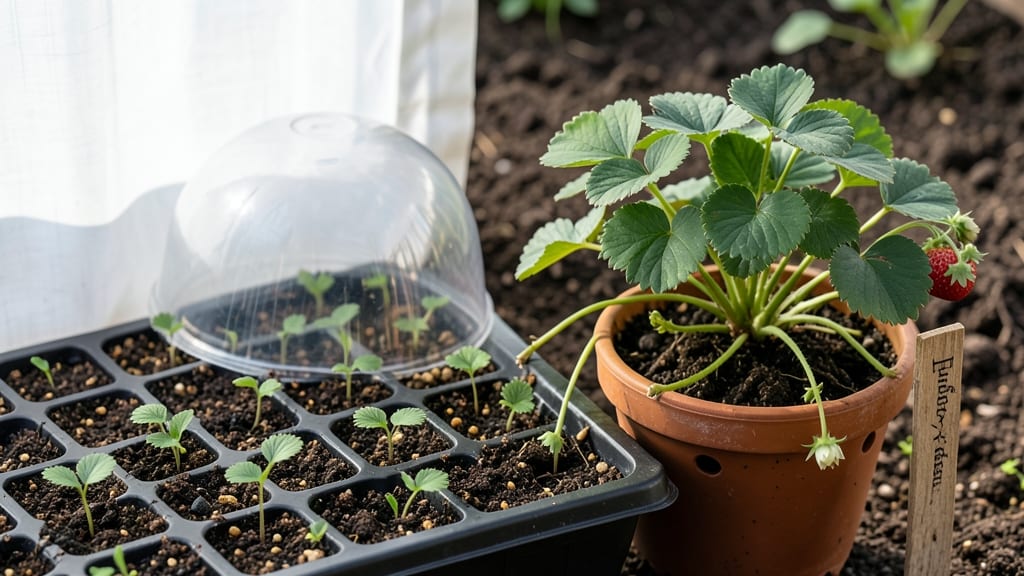
Growing strawberries from store-bought fruit means your first harvest could be just 6-8 weeks away—no nursery trips required. 🌱 The secret lies in those tiny seeds inside the berries, which hold the same potential as heirloom varieties.
I've turned grocery-store berries into thriving plants that produce fruit for years, and you can too with just a few simple supplies and patience.
You'll need ripe strawberries (the fresher, the better), a shallow container, moist paper towels, and a sunny spot with well-draining soil. The process starts by carefully extracting seeds from the fruit, then germinating them in a warm, humid environment.
Once sprouted, you'll transplant them into soil and watch as they develop into hardy plants ready for your garden or containers.
Expect your first true leaves within 2-3 weeks, followed by established plants in about 6-8 weeks. With proper care—consistent watering, morning sunlight, and occasional fertilizer—they'll reward you with sweet berries by next season. The best part? These plants often produce runners, letting you expand your patch for free.
This method works year-round in containers, making it perfect for small spaces or climates with short growing seasons. Just adjust planting times to match your local frost dates. The key is consistency—stay patient, and you'll soon have a thriving strawberry patch that keeps giving.
📚 In This Guide
- What you need
- Instructions
- Tips and common mistakes
- Wrapping up and next steps
What you need
- ● Fresh strawberries: 2–3 ripe, organic strawberries (avoid treated or overly soft ones).
- ● Small pots or containers: 3–4 (4–6 inches deep) with drainage holes. Use plastic cups, yogurt containers, or seedling trays.
- ● Potting mix: 1 bag of seed-starting mix or a lightweight, well-draining soil blend (avoid garden soil—it’s too dense!).
- ● Watering can or spray bottle: For gentle hydration (no heavy watering!).
- ● Plastic wrap or humidity dome: A clear plastic bag or a DIY cover to retain moisture.
- ○ Twine or toothpicks: To secure the plastic wrap (optional but helpful!).
- ● Scissors or sharp knife: For trimming strawberry tops cleanly.
- ○ Rooting hormone (optional): Speeds up root growth—great for beginners!
- ● Grow lights or sunny windowsill: If natural light is limited (strawberries need 6+ hours of light/day).
- ● Fertilizer (balanced, 10-10-10 or organic): A small amount for transplanting.
- ● Garden gloves: To keep hands clean while handling soil.
- ● A sunny spot (indoors or outdoors) with indirect light (or a grow light setup).
- ● Patience! Strawberries take 4–6 weeks to sprout and months to bear fruit.
- ● Consistency: Keep soil moist (not soggy) and maintain warmth (70–75°F is ideal).
Step-by-Step instructions for growing strawberries from store-bought fruit
Here's how I turn a single store-bought berry into a thriving patch—no special equipment needed.
🌱 Step 1: Select and Prepare the Parent Berry
Choose a fully ripe, disease-free strawberry with at least one healthy, plump achenes (the tiny seeds on the surface). Avoid berries that look shriveled or have white mold. Rinse the berry gently under lukewarm water and pat it dry with a paper towel—moisture speeds up rot during germination.
Here's the thing—you're not growing from the flesh. Those achenes are actually tiny, self-contained fruits, each containing an embryo. Place the berry on a paper towel and let it dry completely for 24 hours. This prevents fungal growth while the achenes prepare for planting.
💧 Step 2: Plant the Achenes in Moistened Growing Medium
Fill a 4-inch diameter container with well-draining potting mix (not garden soil—it compacts too much). Moisten the mix until it feels like a damp sponge when squeezed. Press the dried berry into the surface so the achenes are in contact with the soil but not buried—light coverage only. I tap the container gently to ensure good seed-to-soil contact.
Cover the container with a clear plastic dome or plastic wrap to create a humid microclimate. Place it in a spot with bright, indirect light (no direct sun yet). Strawberry achenes germinate best at 70-75°F. If your home runs cooler, a seedling heat mat set to 75°F speeds up germination.
🌿 Step 3: Monitor for Sprouts and Thin as Needed
Check daily for sprouts—you'll see tiny green leaves emerge in 7-14 days. Once they appear, remove the plastic cover immediately to prevent damping-off. Water gently from the bottom of the container (place it in a shallow tray of water for 10 minutes) to avoid disturbing the delicate seedlings.
If multiple achenes sprout from one berry, thin to the strongest seedling when they reach 1 inch tall. Use scissors to snip weak stems at soil level—pulling risks damaging roots. Label your container with the variety (if known) and date. Real talk: these first plants may not fruit the first year, but they'll establish strong roots.
☀️ Step 4: Transition to Light and Prepare for Transplanting
After 4-6 weeks, when seedlings have 3-4 true leaves, move them to a south-facing window or under a grow light for 12-14 hours daily. Strawberries need full sun to develop strong stems and flavor. You'll notice leggy growth if light is insufficient—adjust immediately by moving the light closer or supplementing with a grow bulb.
Hardening off begins 2 weeks before transplanting. Start by placing seedlings outside in partial shade for 1 hour daily, gradually increasing exposure. After 7-10 days, they should tolerate full sun for the day. Transplant to the garden or larger containers when nighttime temperatures stay above 50°F. Space plants 12-18 inches apart in well-draining soil.
✂️ Step 5: Maintain and Encourage Fruit Production
Once established, strawberries need 1 inch of water weekly (more in drought). Mulch with straw to retain moisture and prevent weeds. Remove first-year flowers to redirect energy to root growth. You'll see runners (long stems with baby plants) in spring—either let them root into new spots or cut them back to focus energy on the parent plant.
Here's where it gets fun—watch for white flowers in the second year. Each flower cluster can produce 20+ berries. Pinch off any mature leaves touching the soil to reduce disease risk. Harvest when berries are fully red and slightly soft to the touch. You'll have a year-round patch if you stagger plantings every 2 months.
Tips & tricks for growing strawberries from store-bought fruit
Turn that grocery store berry into a thriving plant with these pro-level insights—no green thumb required.
Selection Tip: Those achenes are your golden ticket, so choose berries with plump, evenly colored seeds. Avoid any with white fuzz (mold) or sunken spots—these won't sprout. I've found organic store-bought berries work best since they're less likely to have been treated with fungicides that inhibit germination.
Germination Strategy: The 24-hour drying period in Step 1 is non-negotiable—it prevents fungal infections that can wipe out your entire batch. Place the berry on a clean paper towel in a single layer (don't stack) and let it air-dry in a warm spot. If your kitchen feels damp, pop it in the oven with the light on for 10 minutes to speed up drying without cooking the berry.
Lighting Secret: Strawberry seedlings are light-hungry from day one. While bright indirect light works initially, you'll notice leggy seedlings if your space isn't sunny enough. After the 4-6 week mark, supplement with a grow light on a timer (12-14 hours daily) if natural light falls short. I use a simple LED bulb on a shelf above my kitchen window—it's made all the difference in sturdy growth.
Transplanting Timing: The 2-week hardening off period is where most beginners rush and regret it. Start with just 1 hour daily in partial shade, then gradually increase exposure. I've seen plants wilt dramatically after being moved straight to full sun—it's like giving a sunburn to a pale-skinned friend. Check nighttime temps before transplanting: if they dip below 50°F, wait a few more days or use row covers for protection.
Pro Tips for Grow Strawberries From Fruit
- Turn that grocery store berry into a thriving plant with these pro-level insights—no green thumb required.
- Selection Tip: Those achenes are your golden ticket, so choose berries with plump, evenly colored seeds. Avoid any wi...
- Germination Strategy: The 24-hour drying period in Step 1 is non-negotiable—it prevents fungal infections that can wi...
Frequently asked questions
about growing strawberries from fruit—because every gardener deserves a little clarity!Can I grow strawberries from any store-bought berry?
Most store-bought strawberries are hybrids bred for flavor and shelf life, not propagation. Look for organic, seed-bearing varieties (like heirlooms) or ask your local nursery for propagation-friendly options. If unsure, try a few berries—some may still sprout!
How long does it take for strawberry seeds to germinate?
Patience is key! Strawberry seeds can take 2–4 weeks to sprout, especially in cooler conditions. Keep soil consistently moist (but not soggy) and maintain warmth (70–75°F). A heat mat or sunny windowsill speeds things up.
What’s the best temperature for growing strawberries indoors?
Strawberries thrive in 60–75°F during the day and 50–60°F at night. Avoid drafts or cold windowsills. If your home runs cooler, use a grow light and keep pots near a warm spot—like above a fridge—to mimic ideal conditions.
Why aren’t my strawberry plants growing leaves?
Leggy, weak plants often signal low light or overcrowding. Move them to a brighter spot (6+ hours of sunlight) and thin seedlings to 2–3 inches apart. Yellow leaves? Check for overwatering—strawberries hate soggy roots!
Can I grow strawberries from fruit in winter?
Start seeds indoors 8–12 weeks before your last frost (use grow lights if natural light is limited). Transplant seedlings outdoors after soil warms to 40°F. For year-round harvests, grow in containers and bring them inside during harsh winters.
Pro Tip:
Label your seedlings! Strawberry varieties mature at different rates—some may fruit in 6 months, others take a year. A simple popsicle stick with the date and type keeps your patch organized and stress-free.
Wrapping up and next steps
Growing strawberries from store-bought fruit is a rewarding journey that turns a simple grocery trip into a thriving garden adventure! 🌱 With just a few berries, patience, and the right care, you’ll soon enjoy homegrown sweetness—whether in containers, raised beds, or your backyard.
The best part? You’re not just saving money; you’re cultivating fresh, flavorful fruit with minimal effort.
Ready to take the next step? Start small—plant a few berries this season and expand your patch as you gain confidence. Before you know it, you’ll be sharing your harvest with neighbors or even selling extras at a local market. Happy growing! 🍓✨