
Vegetables
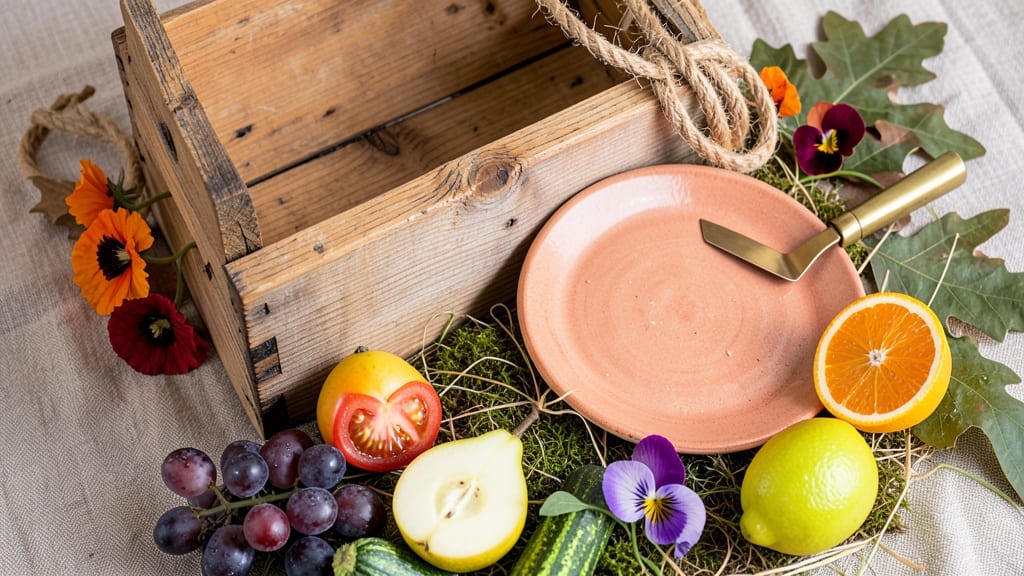
Transform your harvest into art with fruits and vegetables that guests will photograph. 🌿 These edible garden sculptures turn zucchini, apples, and herbs into stunning centerpieces that double as conversation starters—and you can eat them afterward.
The key is selecting produce with bold colors and interesting shapes: heirloom tomatoes, striped eggplants, or even a pyramid of purple cabbage. A simple wire frame or wooden base keeps everything stable while letting the produce shine.
I’ve used everything from a single giant pumpkin as a tabletop bowl to a tower of stacked melons that doubles as a drink cooler.
You’ll end up with displays that look like they belong in a high-end restaurant, not your backyard. The best part? Everything stays fresh for 3-5 days with the right prep—no wilting, no browning, just edible beauty that’s as delicious as it is decorative.
Works for any garden size, from patio containers to full-yard installations. Here’s how to make it happen without the fuss.
📚 In This Guide
- What you need
- Instructions
- Tips and common mistakes
- Wrapping up and next steps
What you need
- ● Fresh fruits & vegetables: Choose firm, ripe produce like apples, pears, carrots, cucumbers, bell peppers, tomatoes, and citrus fruits. Aim for at least 3-5 lbs of mixed produce for small sculptures or 10+ lbs for larger pieces.
- ● Sharp chef’s knife (8-10" blade) or paring knife for precision cuts.
- ● Cutting board (preferably wooden or plastic to avoid dulling knives).
- ● Food-safe paintbrushes (set of 3-4 sizes) for detailing.
- ● Edible paint: Natural food coloring (gel or powder) + apricot jam or yogurt as a base.
- ● Honey or corn syrup (for shine and adhesion).
- ● Toothpicks or skewers (for assembling layered designs).
- ● Plastic wrap or parchment paper (to keep produce fresh during work).
- ● Stencils or templates (printed or hand-drawn) for intricate designs.
- ● Damp paper towels to prevent produce from drying out.
- ● Small bowls for organizing paint colors.
- ● Non-slip mat to secure produce while cutting.
- ● Citrus zester for adding texture to sculptures.
Instructions for crafting stunning edible garden sculptures
Transform your harvest into living art that delights the senses and feeds the soul.
🌿 Step 1: Select Your Base Materials with Intention
Choose seasonal produce with contrasting shapes, colors, and textures for visual impact. A round zucchini paired with long cucumbers and leafy kale creates instant drama. I always start by arranging my materials on a clean surface to see how they interact—think of them like paint on a palette. For stability, opt for sturdy vegetables like eggplants, squash, or pumpkins as your foundation pieces.
Wash everything gently with a damp cloth to remove dirt while preserving crispness. Pat dry immediately to prevent soggy surfaces that will cause your sculpture to collapse. Here's the thing—freshness matters. Use produce within 24 hours of harvest for the best texture and longevity. If your garden isn't producing yet, visit a local farmers' market for the freshest, most vibrant ingredients.
✂️ Step 2: Prepare and Shape Your Elements
Use a sharp chef's knife to carve or slice vegetables into your desired forms. For example, hollow out a small pumpkin to create a bowl shape, or slice bell peppers into thin strips to form a lattice pattern. I like to sketch my design lightly on the produce with a water-soluble marker first—this prevents over-cutting and helps maintain structural integrity.
Work quickly to minimize oxidation. Apples, pears, and stone fruits bruise easily, so handle them with care and use them toward the top of your sculpture where they'll be less stressed. For leafy greens like romaine or cabbage, trim stems to create clean lines. Remember, the fresher the cut, the longer your edible art will last—aim to complete shaping within 30 minutes of washing.
🪴 Step 3: Assemble Your Sculpture with Balance in Mind
Begin with your heaviest pieces at the base to create stability. A large cabbage head or squash makes an excellent foundation. Gradually build upward, using smaller elements like cherry tomatoes, radishes, or herbs to fill gaps and add detail. I often use edible "glue" like honey or lemon juice to secure pieces temporarily—just a dab between surfaces holds them without damaging the produce.
Step back frequently to check proportions. The goal is harmony, not perfection. If one side feels too heavy, redistribute weight by adding lighter elements like basil leaves or microgreens. For extra flair, incorporate flowers (like nasturtiums) or herbs (like rosemary sprigs) that complement your color scheme. This is where creativity shines—don't be afraid to experiment with unexpected pairings, like pairing purple cabbage with golden beets for a striking contrast.
☀️ Step 4: Display and Preserve Your Masterpiece
Place your sculpture in a cool, shaded area to extend its life. Direct sunlight accelerates spoilage, so avoid windowsills or outdoor exposure during peak heat. For indoor displays, a ceramic platter or wooden board elevates the presentation and protects surfaces. I like to mist my sculptures lightly with water every 4-6 hours to maintain crispness—just enough to dampen surfaces without creating puddles.
Here's the secret to longevity: work with what you have. A sculpture made entirely of hard vegetables (like carrots, celery, and fennel) will last 3-5 days, while one with soft fruits (like berries or peaches) may only last 1-2 days. For maximum impact, photograph your creation before it begins to wilt—those images make wonderful keepsakes. And remember, if any piece starts to spoil, simply remove it and enjoy it immediately in a salad or snack.
Tips & tricks for perfect edible garden sculptures
A few creative tweaks can transform your edible art from charming to show-stopping. Here's how to elevate your garden sculptures with professional flair.
Ingredient Selection Tip: The secret to a sculpture that lasts lies in your produce choices. Opt for vegetables with natural structural integrity—like celery stalks for vertical lines or radishes for geometric shapes—rather than relying solely on soft fruits. I've found that fennel bulbs make excellent arches, while carrot tops create whimsical hair-like textures. For maximum durability, select produce with firm skins like eggplant or squash for your foundation pieces, as they'll hold their shape longest.
Technique Tip: When sketching your design on produce in Step 2, use a water-soluble marker that won't stain—this is crucial for maintaining your sculpture's edible quality. For more precision, I like to tape a small piece of parchment paper under my work surface to catch any drips. And here's a pro move: if you're working with delicate produce like bell peppers, lightly brush them with a tiny bit of cornstarch before carving. This creates a subtle barrier that prevents excessive moisture loss during the 30-minute shaping window.
Make-Ahead Strategy: You can absolutely prepare components in advance to save time! Wash and dry your produce up to 24 hours ahead, then store it in separate containers lined with paper towels to absorb excess moisture. For the most ambitious, you can even sketch designs on your produce the day before—just store it uncovered in the fridge to prevent condensation buildup. The key is to assemble your sculpture within 2 hours of final shaping to maintain freshness and crispness.
Display Wisdom: For indoor displays, consider using a shallow glass bowl as your base instead of a platter—it creates a natural elevation that makes your sculpture appear more dramatic. If you're displaying outdoors during warm weather, place a small dish of ice cubes nearby to refresh your misting water every 4-6 hours. This keeps your water cool enough to prevent wilting while maintaining that perfect crisp texture. For evening displays, I recommend using a small LED tea light placed strategically to highlight your sculpture's most intricate details.
Pro Tips for Art With Fruits And Vegetables
- A few creative tweaks can transform your edible art from charming to show-stopping. Here's how to elevate your garden...
- Ingredient Selection Tip: The secret to a sculpture that lasts lies in your produce choices. Opt for vegetables with ...
- Technique Tip: When sketching your design on produce in Step 2, use a water-soluble marker that won't stain—this is c...
Frequently asked questions
Got questions about creating stunning edible art with fruits and veggies? Here are some of the most common ones—plus quick answers to spark your creativity!
What’s the best way to preserve my fruit-and-veggie sculptures for longer?
Most edible art lasts 2–3 days in the fridge (longer for veggies like carrots or cabbage). For extra longevity:
- Use non-perishable veggies (e.g., bell peppers, cucumbers, radishes).
- Store in airtight containers with paper towels to absorb moisture.
- For fruits, toss in lemon juice (prevents browning).
Can I use any fruits/veggies, or are some better for sculpting?
But some are superior for shape, texture, and durability:
- Best for structure: Carrots, celery, bell peppers, cabbage.
- Best for color: Red onions, cherry tomatoes, beets, grapes.
- Best for "glue": Hummus, whipped cream cheese, or yogurt dip.
How long does it take to make these sculptures?
Time varies by complexity:
- Simple shapes (e.g., flower arrangements): 10–20 mins.
- Moderate (e.g., animals, geometric designs): 30–60 mins.
- Advanced (e.g., intricate faces, 3D scenes):** 1–2 hours.
What if my sculpture falls apart? Troubleshooting tips!
No worries—here’s how to fix common issues:
Problem
Solution
Fruits/veggies wilt or soften
Use sturdier bases (e.g., cucumber "scaffolding") or chill in ice water for 10 mins before arranging.
Colors fade or bleed
Rinse veggies in cold water before cutting. Avoid citrus (acid can dull colors).
Glue isn’t holding
Try edible "super glue": whipped cream cheese + a pinch of sugar for stickiness!
Can I mix fruits and veggies in one sculpture?
Yes! Mixing textures and colors makes art even more dynamic. Just pair wisely:
- Safe combos: Carrot "bones" + grape "eyes" (e.g., a fox face).
- Avoid: Mixing high-moisture fruits (like melon) with starchy veggies (like potatoes)—they’ll spoil faster.
Wrapping up and next steps
From vibrant still-life arrangements to whimsical edible sculptures, art with fruits and vegetables proves that creativity and sustainability go hand in hand! 🌈 Whether you're a seasoned artist or a curious beginner, these edible masterpieces add a splash of color, flavor, and fun to any gathering.
The best part? Your guests won’t just admire the art—they’ll savor it!
Ready to turn your next event into a feast for the eyes and the palate? Grab a knife, a cutting board, and let your imagination run wild. Start small with a fruit platter or go bold with a full-scale garden sculpture—your canvas is ripe for the picking! 🍉✨